Tuesday, December 31, 2013

New Strings

Well, Samurai Fretless is complete ...
for the most part. The Austrian flatwound classical
guitar strings could only be found online and if you have
a stringed instrument, I strongly encourage you to check out
String by Mail ( www.stringsbymail.com ). Their customer
service it is top notch. Prices? Way cheaper than local and
s/h is really cheap. They have strings for just about any
stringed instrument! I will definitely be buying from them again!

 
Being that it's a fretless and rosewood fingerboard,
my resto-mod project required a flatwound string.
After much research and talking to professional
musicians and luthiers, I concluded that the CF128N's
(with a wound 4th string) by Thomastik were
the right choice for me.

I still need to lower the height of the string nut, but
needed for the strings to adjust to the humidity/temp
level of the room for a day or so before I start
stretching, de~/re-stretching them multiple times as
they were cold from the Christmas weather of riding in
delivery trucks. I might work on that tomorrow.


I found that lacing wrapped strings around
the bridge/tie-block is a more tedious than I thought and
thus you can see that the bass E string only has one lace wrap,
but it's not a problem, because it's tight and I don't think
it will need to be adjusted.


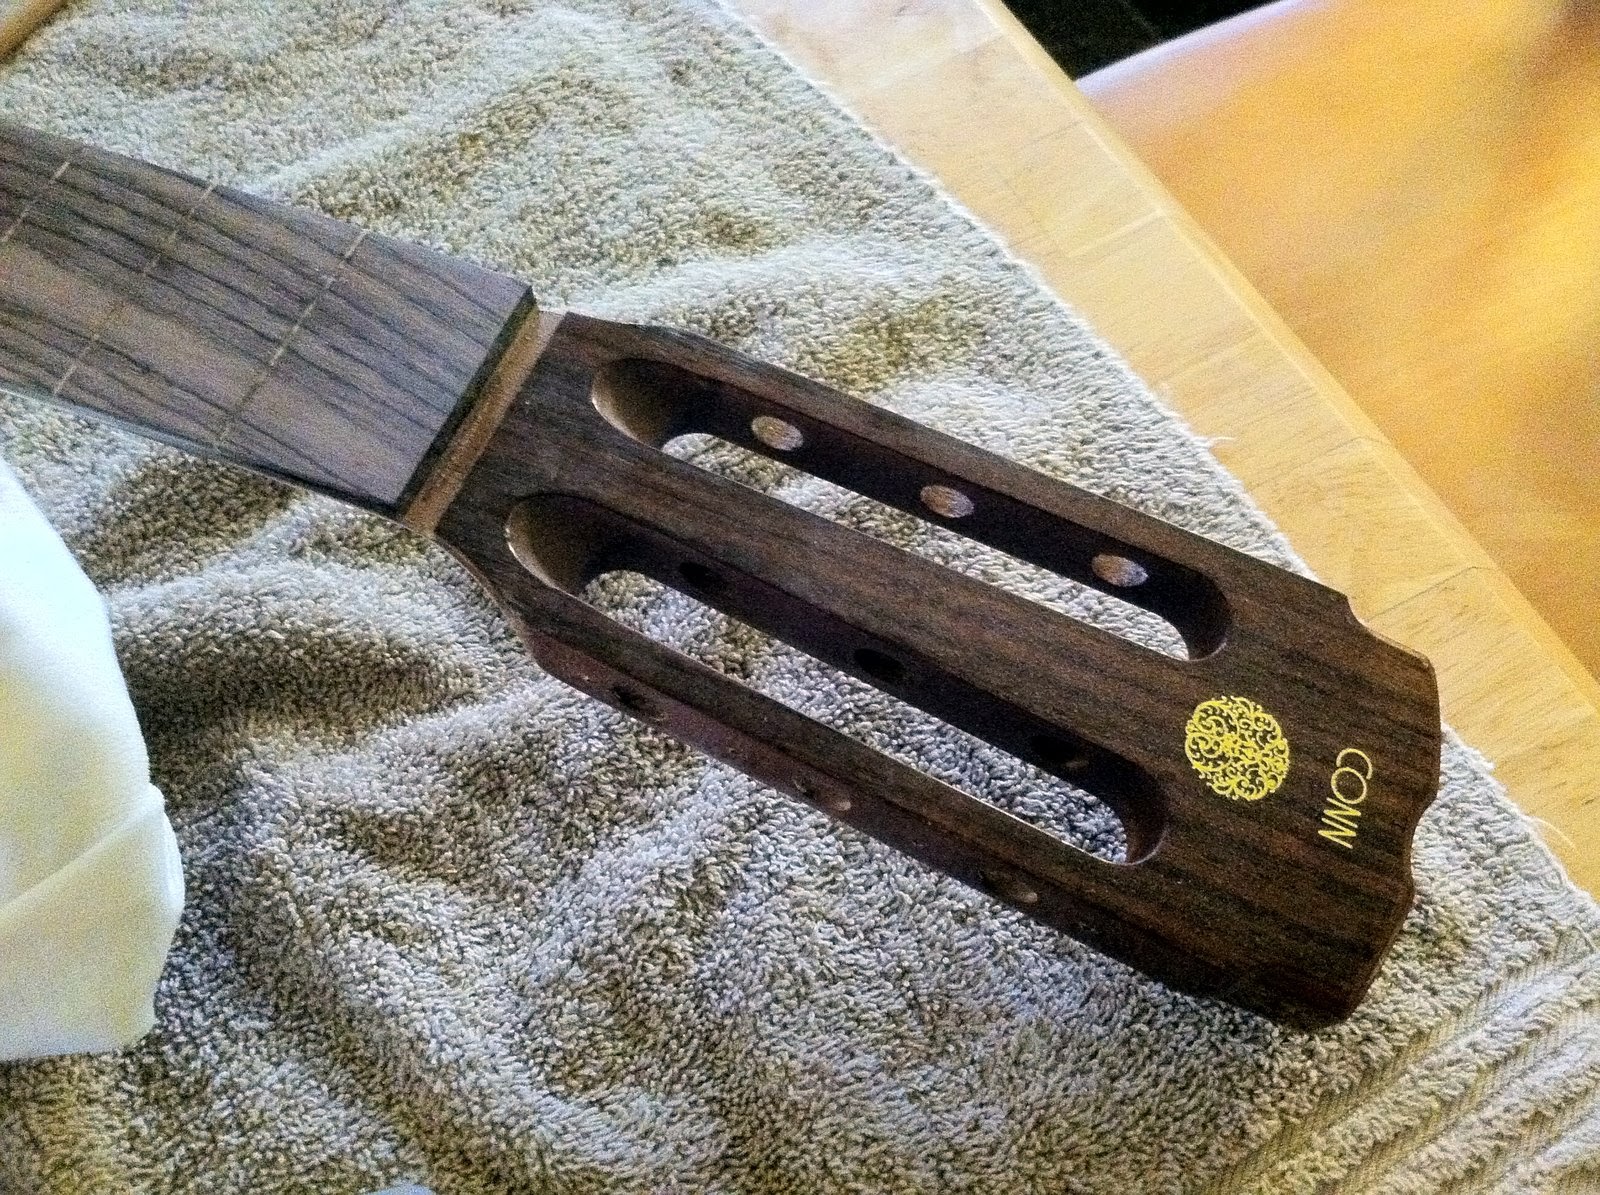
I opted to not cut off the string slack at the headstock yet,
as I still need to make some additional adjustments. Also,
for the final roll of the strings, I may roll them again
to make them look a bit cleaner.

I would really like to purchase a hand-drill attachment
to wind the strings with just to speed things up.


Well, the guitar is playable even though the action is still
too high. It plays so different from a fretted guitar. I will
be able to adapt, but it will time some time to gain proficiency.
It's a nearly a different instrument altogether.

I'm glad I ventured into this project.
It was a lot of fun.

Tuesday, November 5, 2013

Hardware cleaning


Completely disassembled the headstock
mechanics and hardware as they likely
hadn't been cleaned in nearly 40 years!


Here is the finished result. Everything is clean again and
works like new! 


The next step will be adjust the heights of the string nut and
then putting on new strings.

Monday, November 4, 2013

Fingerboard finishing

In this post, I repeat some of the work from the previous blog entry, because when I pulled up the masking tape, which was too strong (tacky), it pulled up some of the tan-colored wood filler, so some of the fret slots had to be refilled in areas. This happened because the wood filler adhered rather a bit too securely to the tape. Also, the common masking tape left sticky residue all over the fingerboard as showcased in the following picture.

I removed the sticky residue with naphtha. There is 
something interesting that I learned about naphtha during this 
project. It's not sold in California, where I live, but it's
still available ... just under a different name. Essentially,
naphtha is lighter fluid. It's the same key ingredient. Some
companies will add other ingredients, but from the research
that I've done, those additional ingredients (if any) in lighter
fluid will not harm the guitar [also, you're not soaking
the wood in the liquid]. 

So, a clean rag/towel with a bit of lighter fluid will clean
off the sticky tape residue just fine. [and for God's sake, don't
smoke when working with any flammable solutions on guitars!] 
Light fluid dissipates quickly, but start out with a little amount
and add more as you feel necessary. Elbow grease is a
large portion of the process. Your goal is to remove 98% of
the sticky residue so that you can begin hand-sanding and
you will not have to worry about clogging up the sandpaper
with glue.

Work outside, with a facemask. Too windy of a day will 
cause the lighter fluid to evaporate too quickly. Do not 
work in the direct sun and preferably in the low~mid 70's 
(approx 22c). If you have a high-end guitar and still confident
in your aptitude, consider working in the garage with a
fan and outside doors open and wear a face mask.


The following images in this blog entry showcase
the completed fingerboard.

There are portions of some of the fret slots that
appear to have woodless gaps in them, but actually,
it is filled with rosewood shavings from when I
leveled the fingerboard. I chose to go with this
two-tone approach as I wanted a semi-zebra-esque
look to final presentation.


The next step will be the hardware cleaning on the headstock.

Monday, July 29, 2013

Fret slot filling

In this stage, I'm taping and filling the fret troughs.


I taped off all of the frets so that the wood filler 
would not embed into the natural grain and 
would only fill the fret troughs. (I'm sure there is 
a proper term for them, but I haven't found it yet.)


With the fingerboard completely taped off, the wood filling
process begins. I have chosen to use Dap's Plastic Wood,
which hardens after application and ready to sand/drill/finish 
in one hour. I was outside during this step and the dry-time
was significantly shorter. Almost causing me to rush. I wouldn't
advise working on a guitar outside, but it was a very nice day 
with low humidity, so it was acceptable for me, my guitar and
the value of this particular guitar. 


In the next three pictures you can see the results of the 
sticky tape residue and there are two notes worth mentioning
here: one, don't use sticky masking tape; get painter's 
tape and two, don't ever try to sand off some form of glue,
such as this, as it will just gum up the sandpaper, but 
instead, use your finger and rub it over the residual glue 
creating friction and you'll be able to easily "erase" it off. 
Be careful though, because you can quickly cause a blister
from the friction heat.


These next three images showcase the post-clean-up 
results. Now, this particular wood filler is made to apply 
in multiple layers (if necessary) and we see here, that it
is necessary for a second application. No worries. I'll 
just do a second application [perhaps] tomorrow.

As far as the finish for this process, after I removed the 
glue residue, I sanded the fingerboard lightly with 
600-grain sandpaper to bring back the smooth surface
once again.


Well, a final application next time and after that, I'll be
moving on to the headstock for necessary restoration.


Fingerboard leveling

Today, I removed the string nut and began leveling the fret board.

As to be expected the fingerboard had tons of wear, warpage and adjustments after nearly 40 years. I'm not sure how noticeable it will be in this first picture, but the fingerboard was so scratched and gouged from years of play with fingernails too long from previous owners.

I had to level the fingerboard in multiple spots in the linear bass line, mid line and treble line. The crosshatched white lines were a guide to show me where the low spots were when sanding and how to address it accordingly. If you're really interested in learning more on this technique, check out the video [playlist] link I posted in the previous journal entry.

[Before]


I really wish you could see how unbelievably clean this restored fingerboard is, but I'm not sure if the picture will do it justice. It's so smooth, clean and level that I'm almost convinced it's better than when it left the factory. lol

[After]


Next step will showcase the process of filling the fret cavities.

Saturday, July 27, 2013

Removing the frets

I learned a lot from watching watching Jason's videos (particularly on refretting in his 22-video [playlist] step-by-step chronicle of the process.) There were other videos on youtube about fret removal techniques, but Jason really had the best approach and the best videos choreography.


As you can see in this picture, especially if you zoom in, 
there are splintered sections of the wood. Instead of sanding
these out, thus creating cavities, I am using a Gorilla Super Glue
to glue them back down. If I were to sand them out, the cavities
would be apparent when the wood filler is added and the end-result
would not be pretty.


Here are some pictures of the professional super glue drying.
It takes about 1:00 minute to dry and 24-hrs to cure. The 
strongest caution I learned during research is to be patient.
Don't rush any steps.

Also, I have not removed the string nut yet and think I 
can work around it when sanding the face of the fingerboard.
If not, I'll deal with it when I get there.


The Setup

Project setup.


Perhaps, if you zoom in, you can see the fingerboard wear over the years, 
so this will need to be completely refinished.


There was a lot of grime and crud next to the frets -- a lot like dental plaque.